
Install Proxmox VE on VirtualBox? A Complete Step by Step Guide
The Proxmox VE is one the most popular open-source hypervisor. You can achieve a lot of virtualization benefit from this tool for home lab or even enterprise setup. So if you are new on Proxmox and wish to have a hands on quick overview, what are you options!
- You can install Proxmox on your spare or old computer. Though it will occupy complete hard drive space and wipe all existing data.
- You can install it on VirtualBox. This is not going to make any mess on your host operating system.
I choose to install Proxmox on a VirtualBox hypervisor for my testing and tutorial purpose. This way I am doing a nested virtualization and this might not able to give me best performance. However it can run almost anything I need to test and once I am satisfied, I can move this to a production server.
The best part, both Proxmox and VirtualBox is free and support almost all operating systems.
On this blog, I am going to show Proxmox installation on an Oracle VirtualBox. You can download Proxmox from here and VirtualBox from here.
In order to simplify the process, I am not showing VirtualBox installation here. Considering you already downloaded and installed your VirtualBox to follow this tutorial.
Create Proxmox Virtual Machine
Open VirtualBox and click on Machine and New or press CTRL+N to create a new virtual machine.

A new virtual machine creation wizard will now open up. Now provide the required information for the new virtual machine.
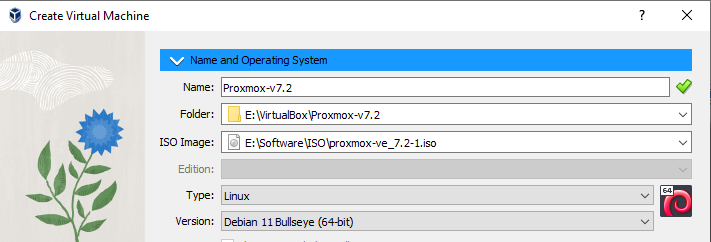
Name: Provide a name for the virtual machine.
Machine Location: I changed the location to organize my files.
Type: Linux
Version: Debian (64bit) – As the Proxmox is based on Debian Linux, I choose Debian.
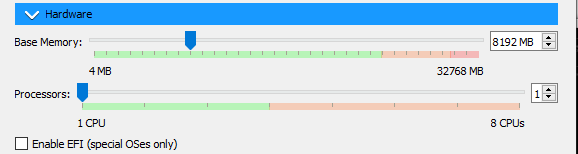
Memory: I am going to run few test machine on it. So allocating around 8GB.
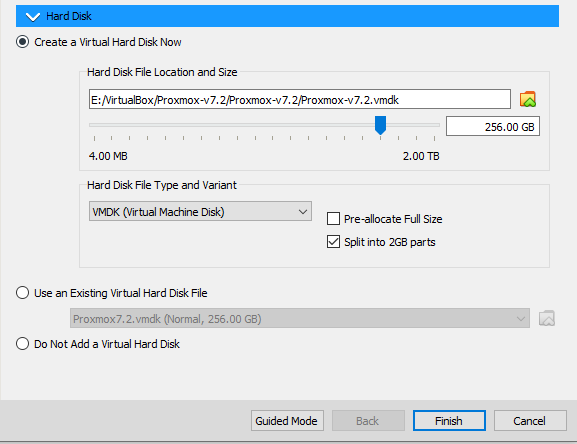
Hard Disk: Choose Create a virtual hard disk. I do split disk into 2GB each for performance.
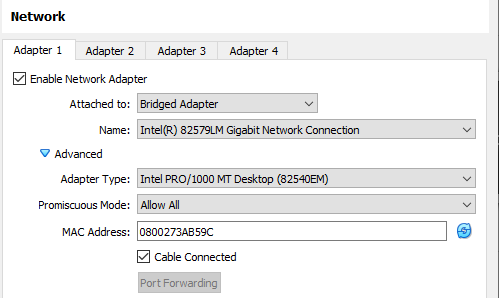
Network: I choose to change network settings to bridged mode. Also allow all VM for the network.
By default, the VirtualBox would assign NAT for any virtual machine you install. It will provide internet access to the virtual machine using the host machine’s IP address, however it will not give inbound access to the Proxmox virtual machine.
So I changed the NAT settings to bridge mode. Now my Proxmox and its all container/vm will get IP address from my DHCP server.
Network traffic is allowed through the physical lan card.
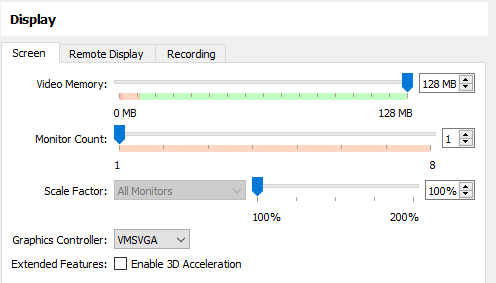
Display/VGA: Increased graphics memory from the default.
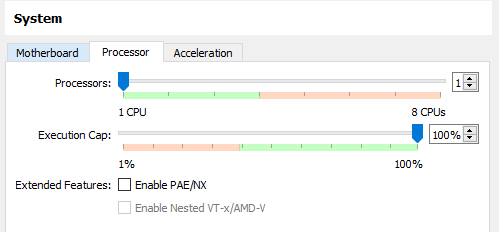
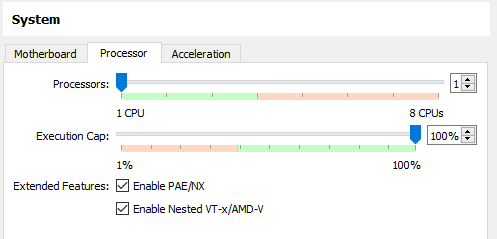
Enable nested VT-X / AMD
I found this option is greyed out on my system. To activate, you have to go though windows command.
Find your VirtualBox installation directory. For me it is, C:\Program Files\Oracle\VirtualBox
Go to Run, type cmd and hit enter.
cd C:\Program Files\Oracle\VirtualBox
VBoxManage list vmx [to find list of vm and select which one to modify]
VBoxManage modifyvm Proxmox-v7.2 --nested-hw-virt on
Now you can press the start button to initiate installation of Proxmox on VirtualBox.
I am also adding the installation video for better understanding. Thanks.